


I made a tangible thing and wrote about it.
This article is also a PDF (≈ 2MB).

Navigate
A. Why?
I had 3 problems.
A.1. Eye Strain
I use two computers. One desktop PC (daytime). And one laptop (evening/nights). I also use other equipment that affects eyesight, with the added glare from a screen.
A.2. Bad Posture
A typical (daytime) workday involves typing, writing on paper, and bending at an office whose chairs and tables are not made for non-standard body sizes. Effects include neck, shoulder and back strain.
Typical (night time) work involves typing at a laptop, drawing and writing in a paper notebook.
So, more stretching and bending (because touch-typing is not always possible). Therein lie the ingredients for “tech neck”.
A.3. Desk Clutter
The desk must have space for typing, writing (on paper) and sketching. At the start of the project, it did not; the laptop stand had to be moved close enough for typing. Cable management, as a result, was...severely lacking.
My work setup had to change.
B. How?
B.1. Challenge #1
The solution must solve all 3 problems: eye strain, bad posture and desk clutter.
B.2. Challenge #2
The solution must meet 5/10 of Dieter Rams’ most important Principles of Good Design.Those principles, being, that:

|
1st | is innovative |
| 2nd | makes a product useful | |
| 3rd | is aesthetic | |
| 4th | makes a product understandable | |
| 5th | is unobtrusive | |
| 6th | is honest | |
| 7th | is long-lasting | |
| 8th | is thorough down to the last detail | |
| 9th | is environmentally-friendly | |
| 10th | is as little design as possible |
B.3. Initial Adjustments
(Recommendations from lookafteryoureyes.org)
Ideal screen placement is 40cm to 76 cm away from face, with screen raised so the top is at eye level. Adjusted the laptop stand so its height would match that. It was also moved back to lean (almost) against a wall. It was high – and far – enough. But its keyboard was difficult to reach.
Connected an old wired mechanical keyboard to the laptop and rested it on the table under the stand. Touch-typing is not always possible, so it had to move closer and there would be no space on the desktop to write or draw. Not with the keyboard resting flat on the surface: it would have to slant.
Created a structure with empty wafer boxes. With each box stacked on top of the other, the keyboard could be raised at an angle. This freed up some space, but not by much.
Enter an old hardcover spiral notebook, onto which the boxes could be stacked. This raised the keyboard from the desk and freed enough space for an A5 book to lay flat (for writing).
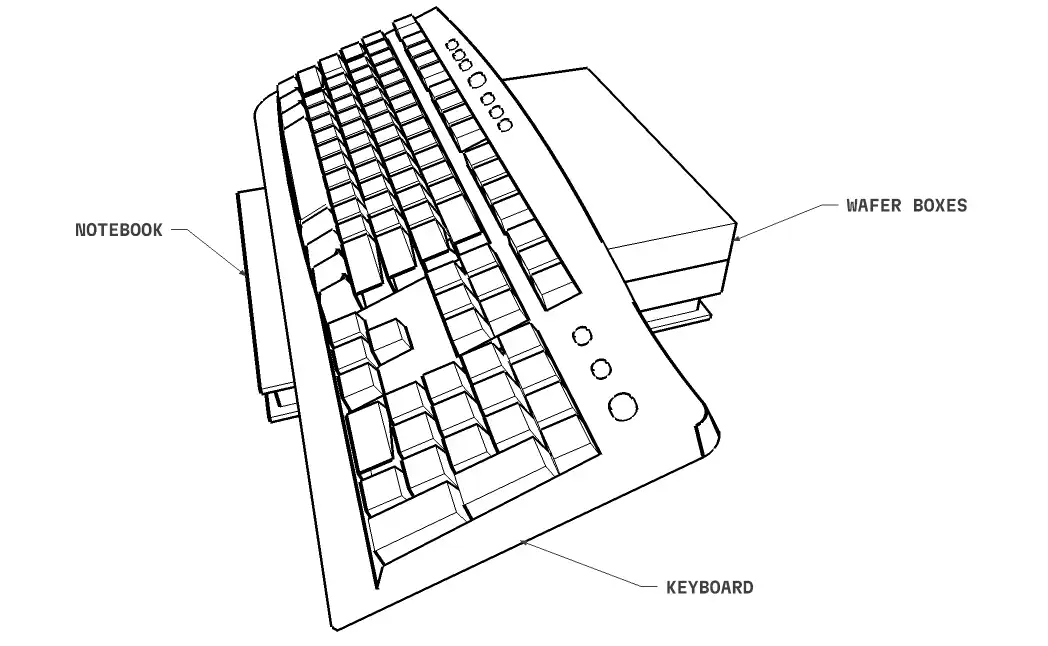
This initial (makeshift) setup remained in use from November 2025 to February 2026, with adjustments to the boxes and angles to find the most comfortable layout. This probably would NOT be ergonomic for someone of “standard” arm length, height and dexterity. But this is not primarily for them.
The wafer boxes began to deform, shift and sometimes collapse. Also: notebooks are for writing, and reading: not propping up computer accessories. There had to be a better way.
So this project (officially) began in December 2025, with the first rough sketches.
B.4. Process
Design
↓
Prototyping
↓
Consultation
↓
Production
↓
Assembly
↓
Installation
↓
Review
B.5. Equipment
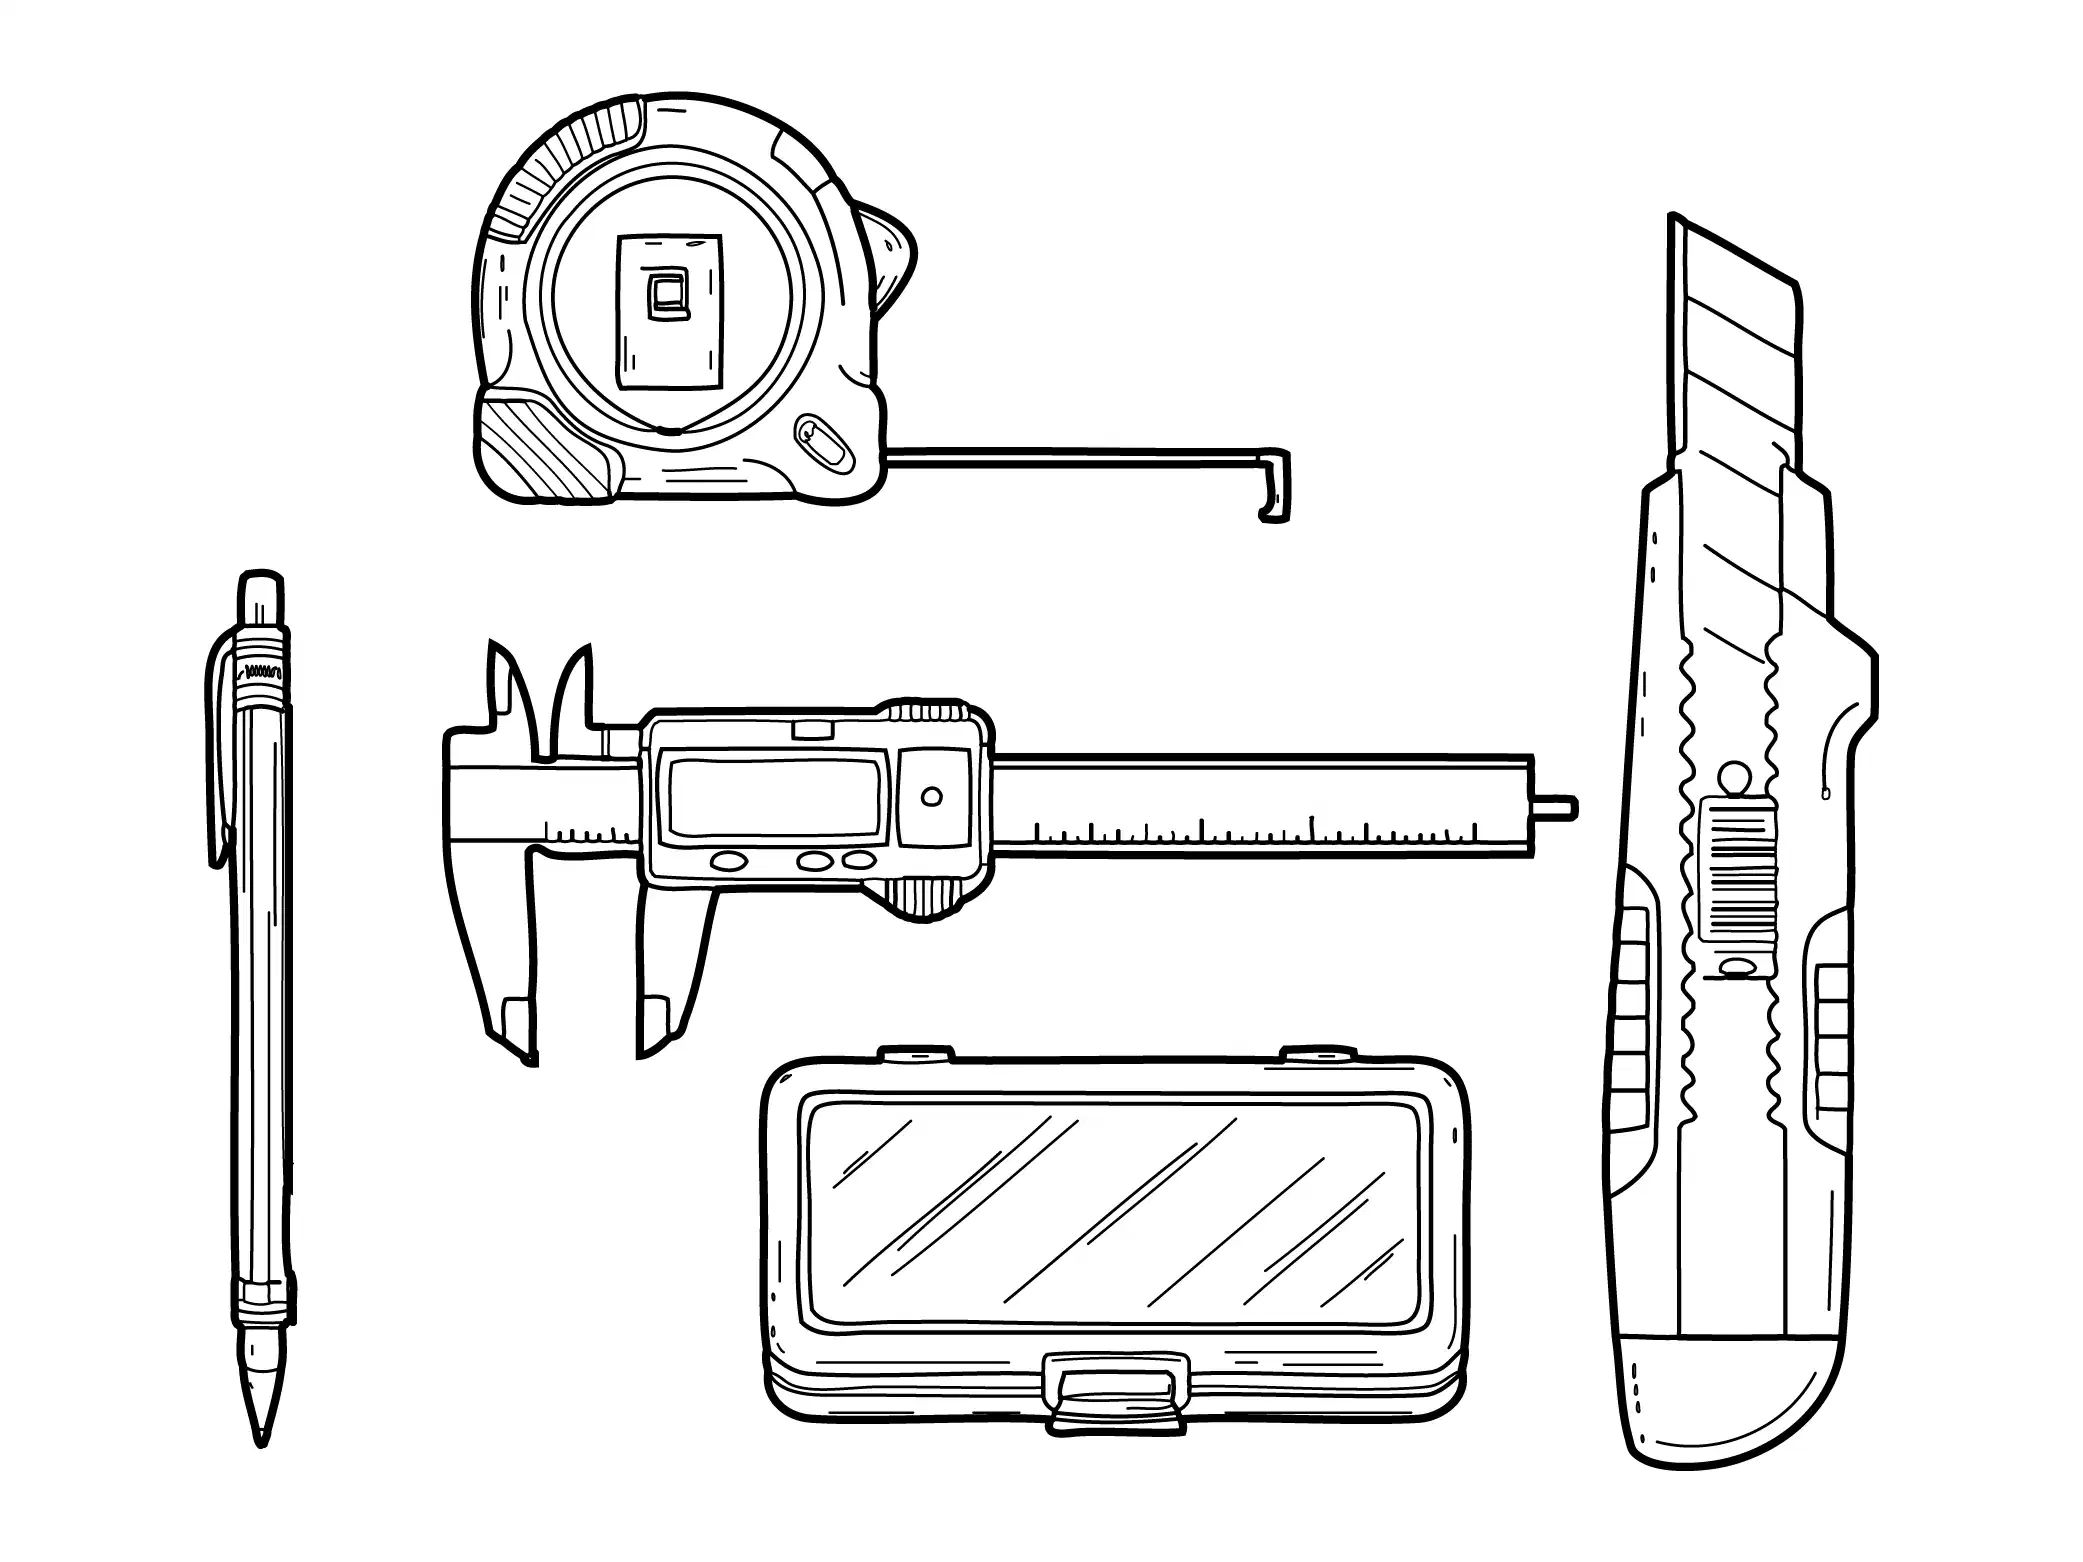
| # | Item |
|---|---|
| 1 | Square Ruled Exercise Book |
| 2 | Pens (Ballpoint) |
| 3 | Ruler (millimeters/centimeters) |
| 4 | Tape Measure |
| 5 | Vernier Calipers (Digital) |
| 6 | Drafting Paper (A4) |
| 7 | Drafting Kit (with Mechanical Pencil) |
| 8 | Geometrical Set |
| 9 | Adhesive Felt Mats (square) |
| 10 | Cutting Mat (A4) |
| 11 | Crafting Knife |
C. Design
C.1. Measurements
Measuring done with vernier calipers, rulers, digital weighing scale and a stiff tape measure.
The Desk
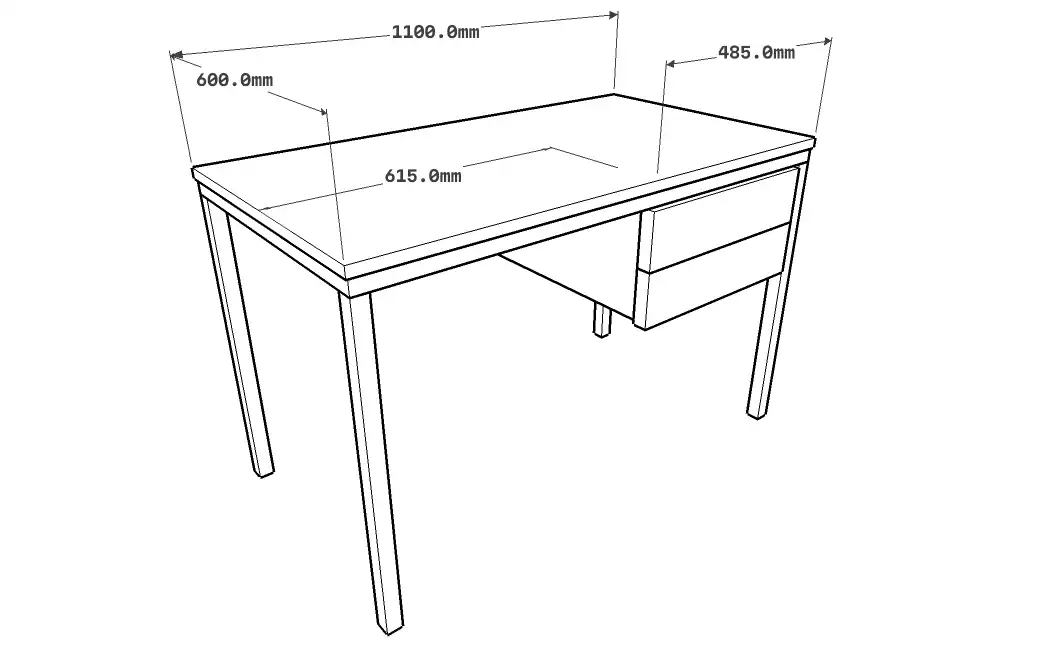
Full desk dimensions (length x width x height): 1100mm x 600mm x 700mm.
Full desktop: 1100mm x 600mm.
Usable space: 615mm x 600mm.
Blocked space: 485mm x 600mm.
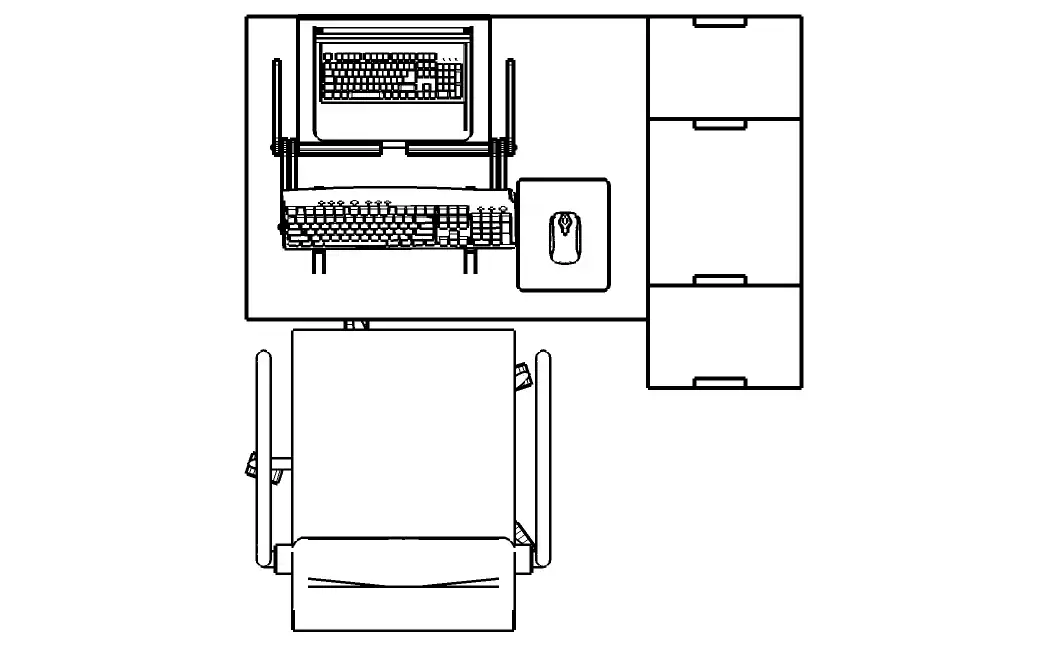
The “blocked” space cannot be used while seated because of the drawers and a desktop shelf.
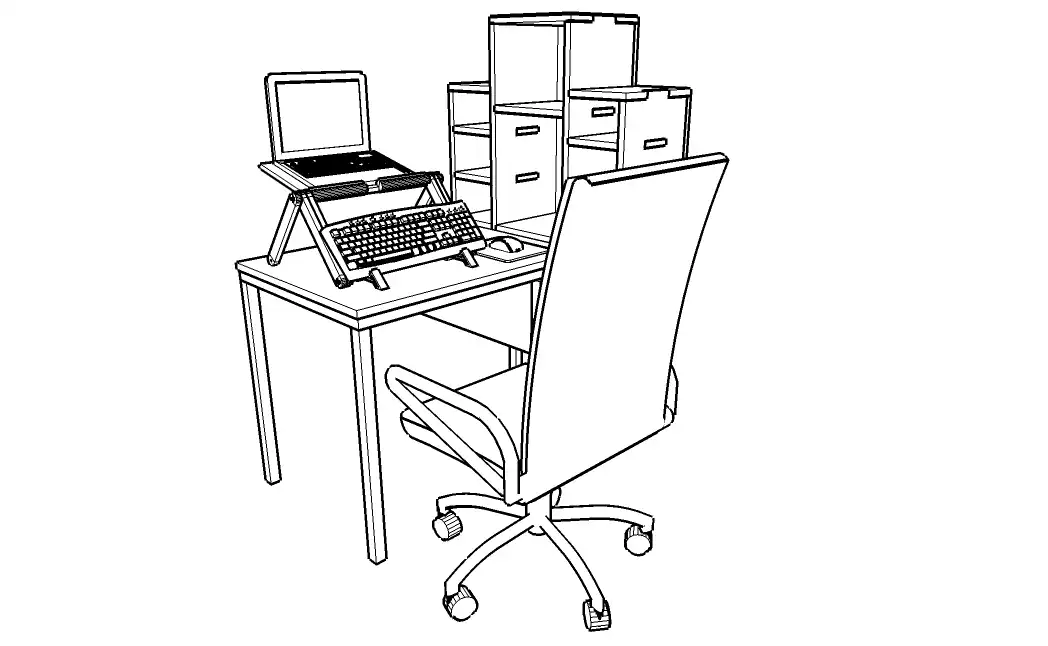
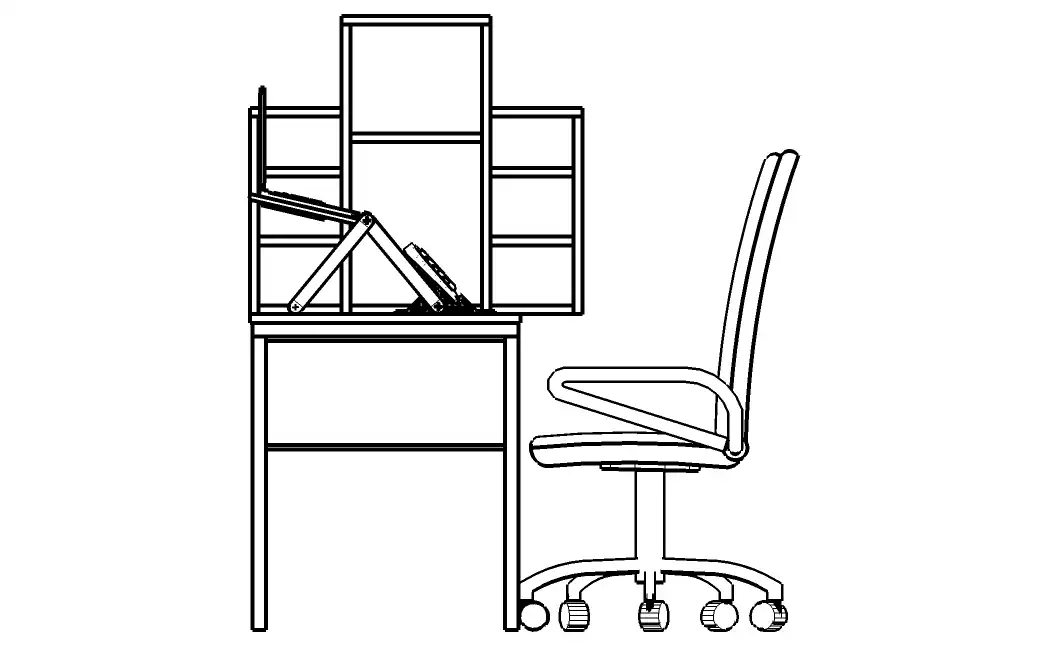
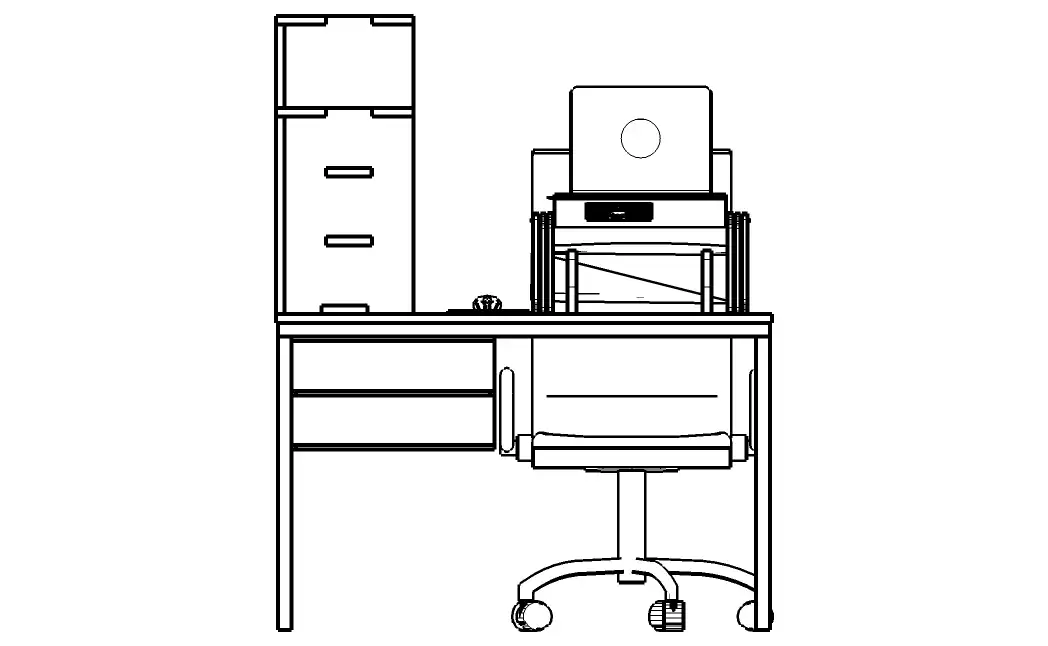
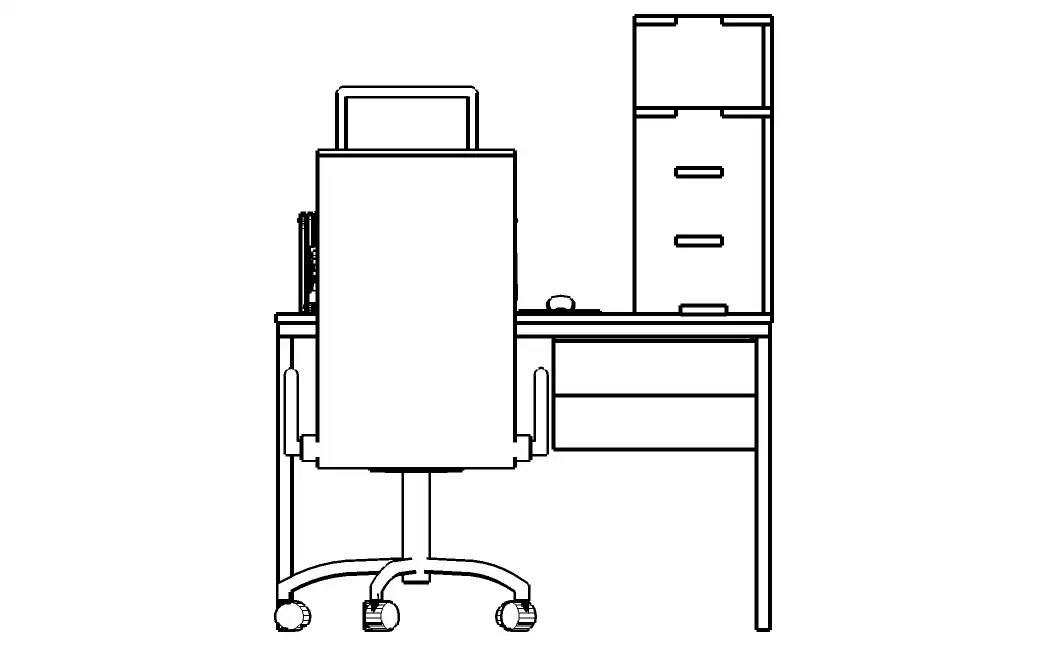
The shelf, while being a prominent feature of the workstation, has no direct influence on this project so is only depicted in the final setup.
The Keyboard
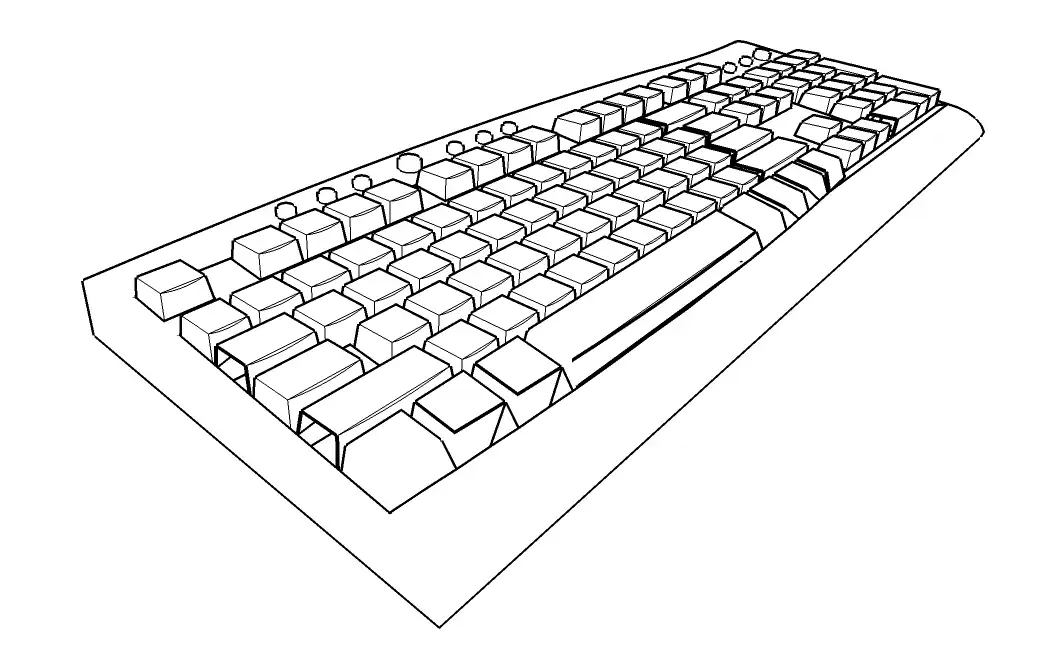
Keyboard dimensions (length x width x height): 460mm x 70mm x 25.2mm
Keyboard weight: 600grams
Wafer Boxes
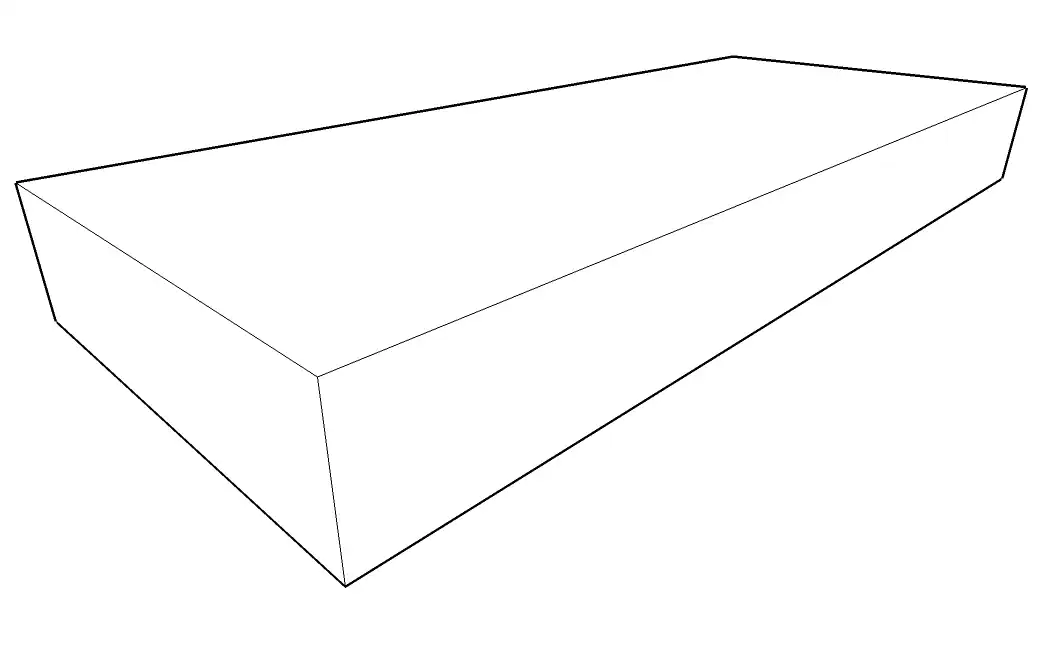
Wafer box dimensions (length x width x height): 220mm x 90mm x 25mm
The Notebook
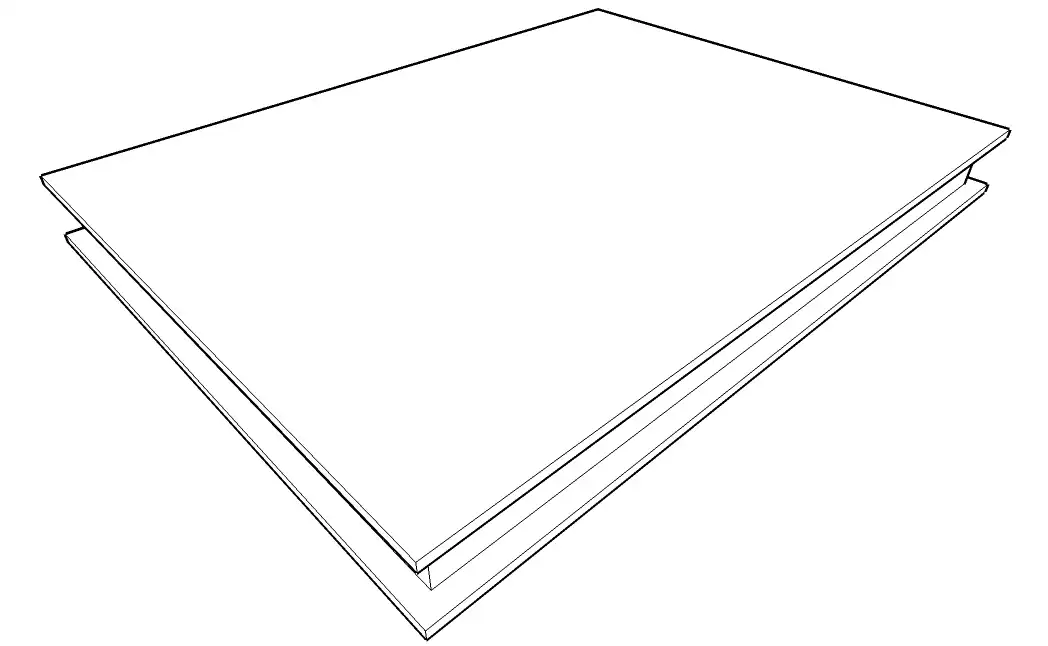
Notebook dimensions (length x width x height): 212mm x 150mm x 20mm
The Makeshift Setup (again)
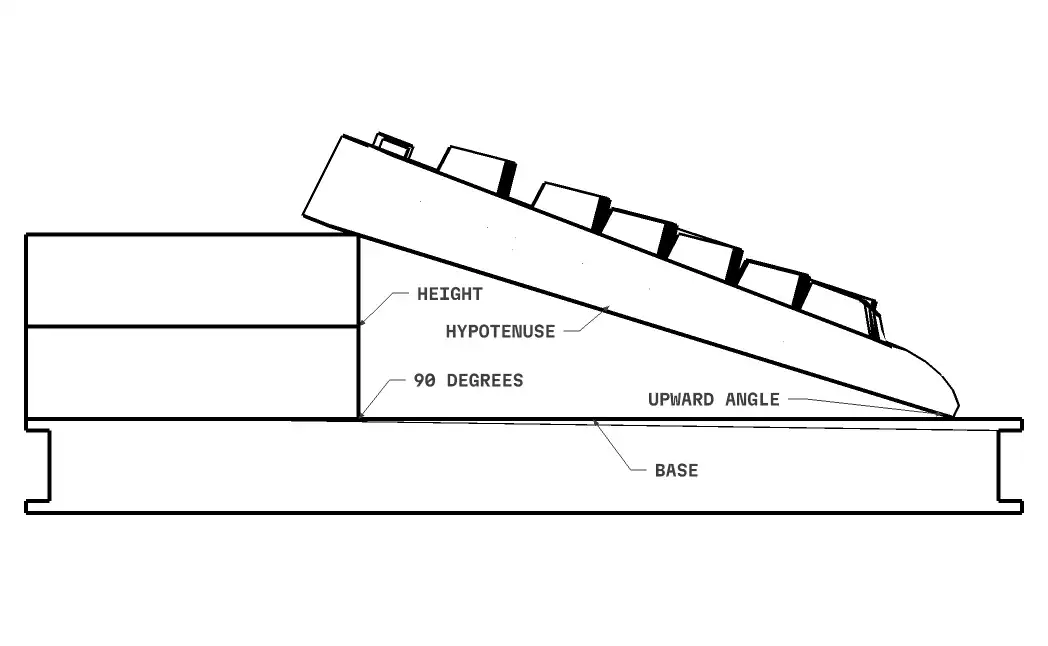
Taken at profile (viewed from the side), what does the gap between the keyboard and boxes resemble? If you thought “right angle triangle”, you’re right.
Trigonometry is your friend.
C.2. Linguistic Diversion
Trigono means “triangle” (Greek).
Trigona means “triangles” (also Greek).
C.3. Product Sketches
Used pen and (square ruled) paper to create rough drafts that would then be used to make measured prototypes. The sketches continued until after the 4th and 5th prototypes.
C.4. Refined Diagrams
Created refined diagrams in Sketchup Make(2017), with standard left, right, front, back, top, bottom and isometric views.
This was repeated with every viable paper prototype, with adjustments for practical 3D printing and functional requirements.
C.5. Philosophy
An ode to trigonometry and practical design.

And if the original function does not work, the solution will be used in other ways. As book/phone stands. As paperweights. As decorative elements.
D. Prototypes
D.1. Structure
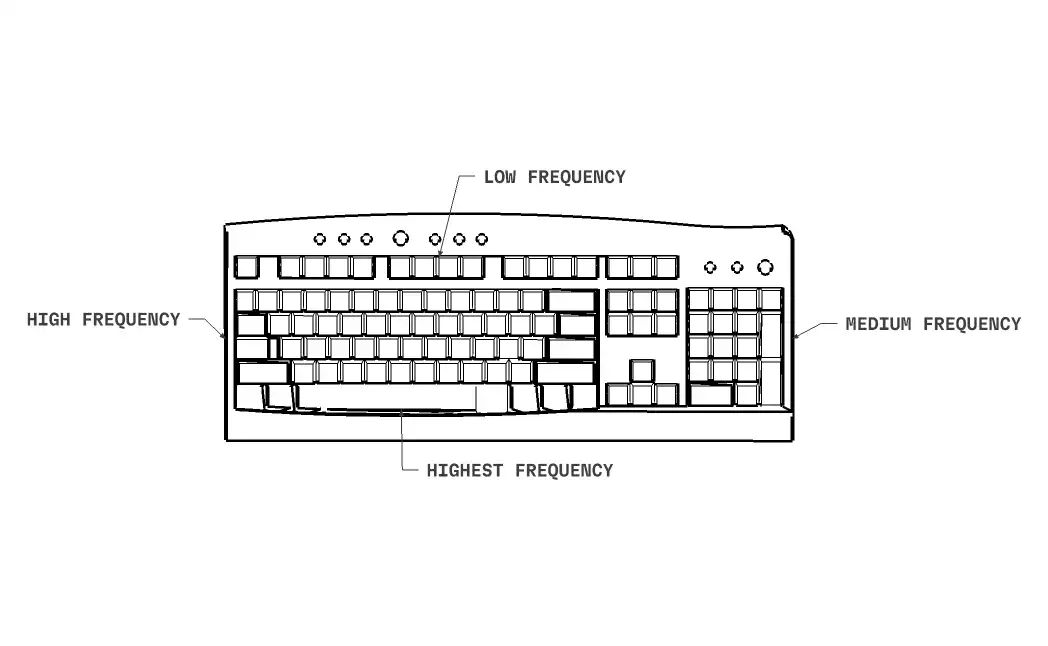
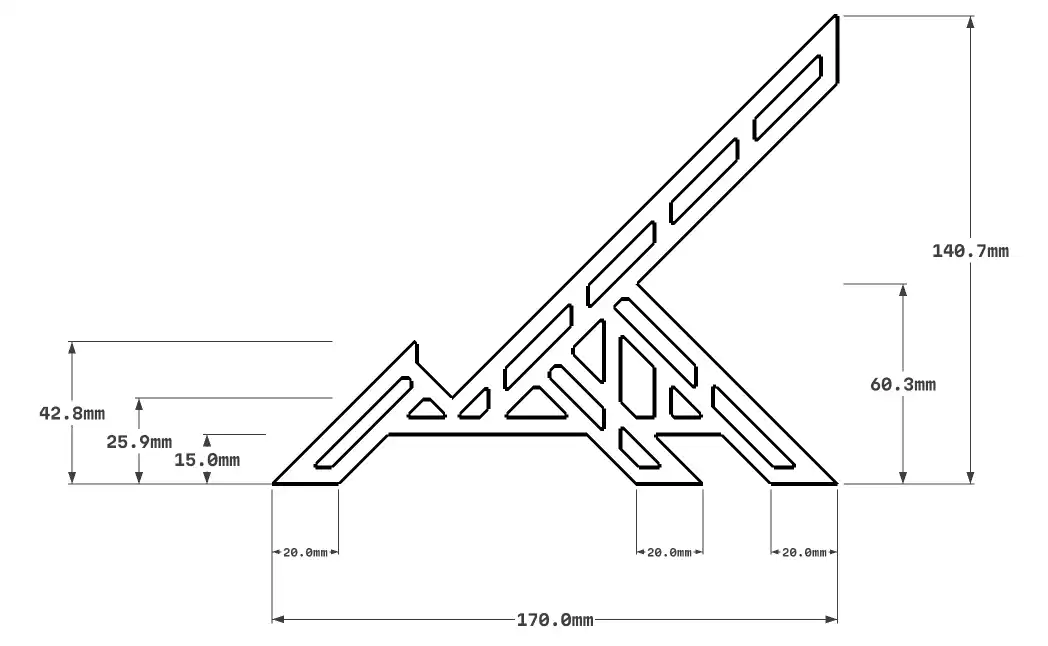
Because of typing mechanics, key placement and keyboard width or breadth, there would have to be 2 symmetrical items.
Since they’re based on actual triangles, I named them “trigons”.
Why 2 pieces?
- Structurally, having one thick piece would make the keyboard wobble while typing.
- Not all keyboards are the same width, so having 2 pieces covers that.
Since there will be more than one printed piece in this project, I adopted the name “Trigona” for the entire project.
Felt mats would have to be added to the final product for more friction and to protect the desk surface.
D.2. Naming Conventions
Project Name (Explained)
Trigona
Name of both triangular pieces (in plural).
KR
Keyboard Rest.
2512
When the project began. December 2025.
-1
Product iteration number.
D.3. Paper Prototypes
Used an A4 sketchbook, drafting set, mechanical and 2H/HB pencils, black ballpoint pen, crafting knife and cutting mat. Also used some (other) wafer boxes to offer support thickness in cardboard because paper is too thin to hold the weight of a 600gram keyboard.
Created profile drafts to serve as prototypes for the solution.
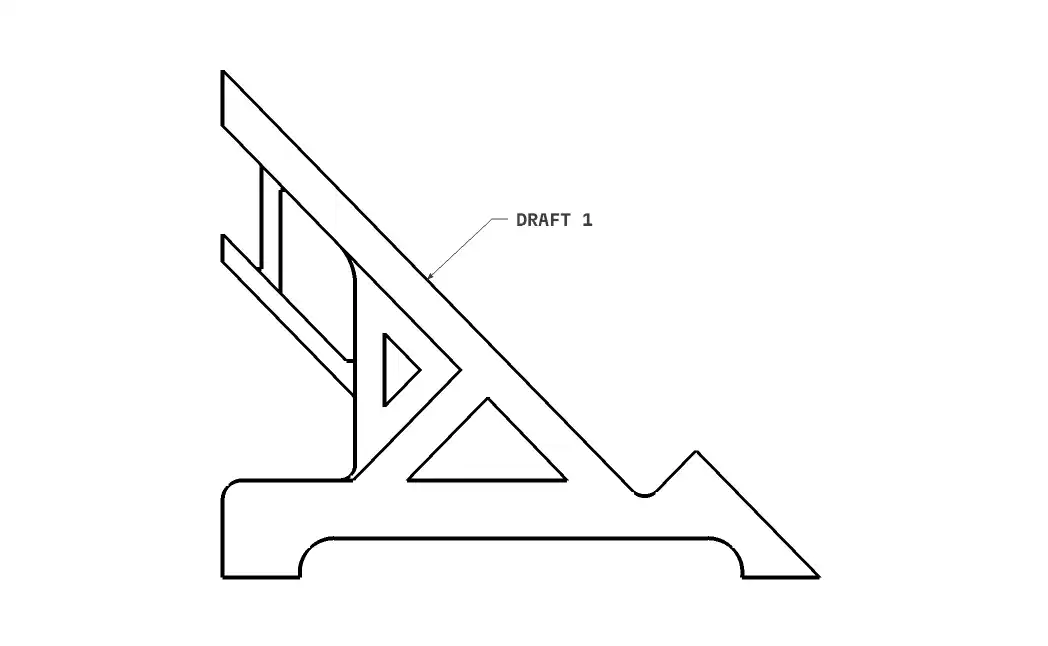
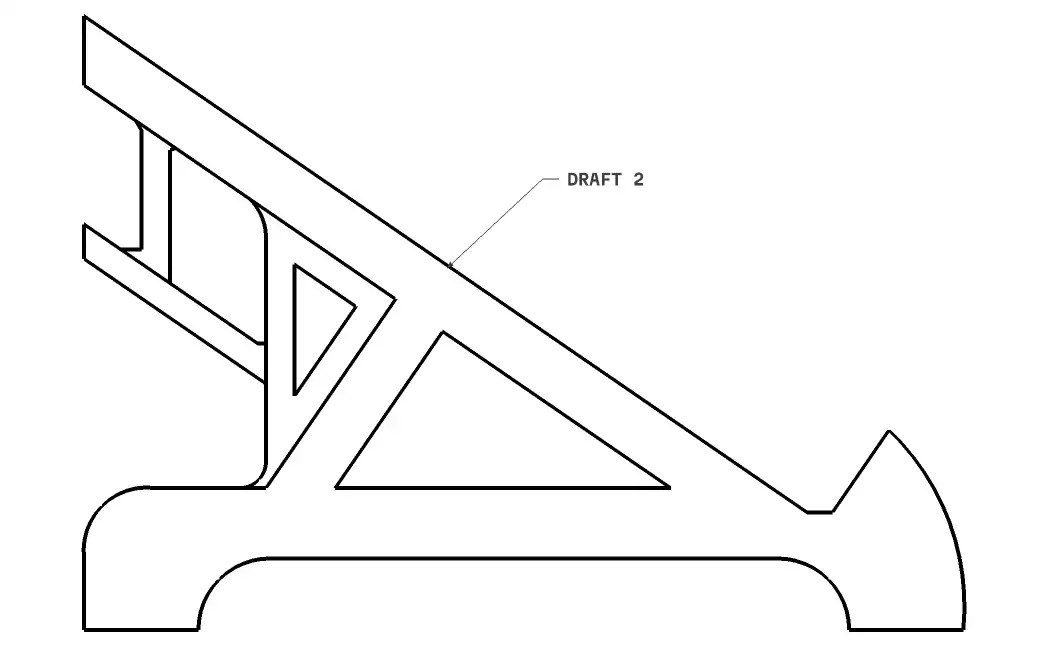
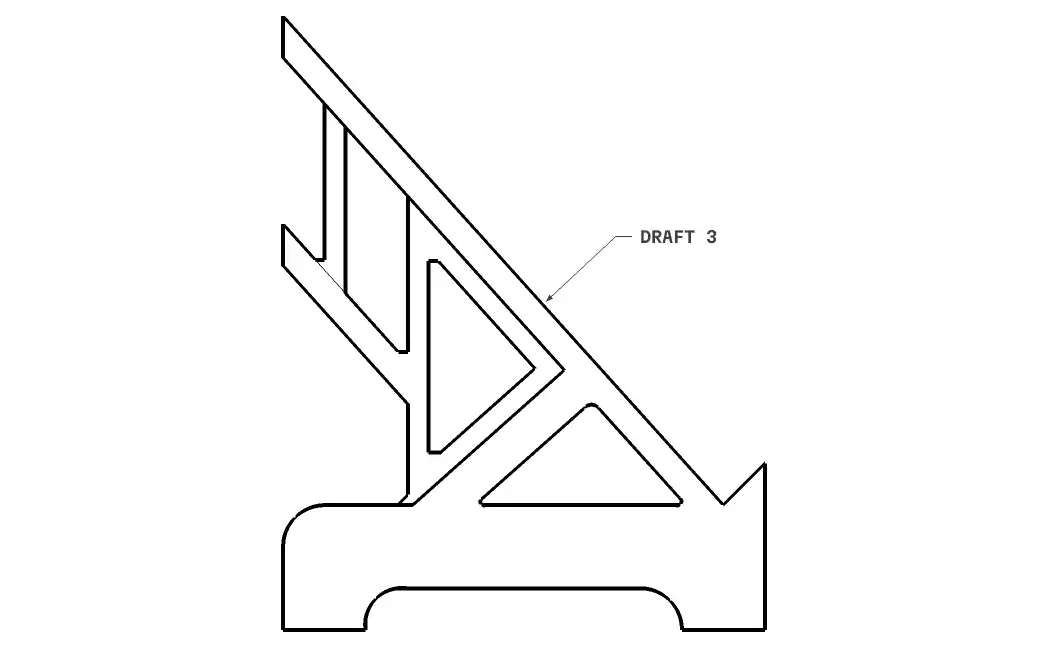
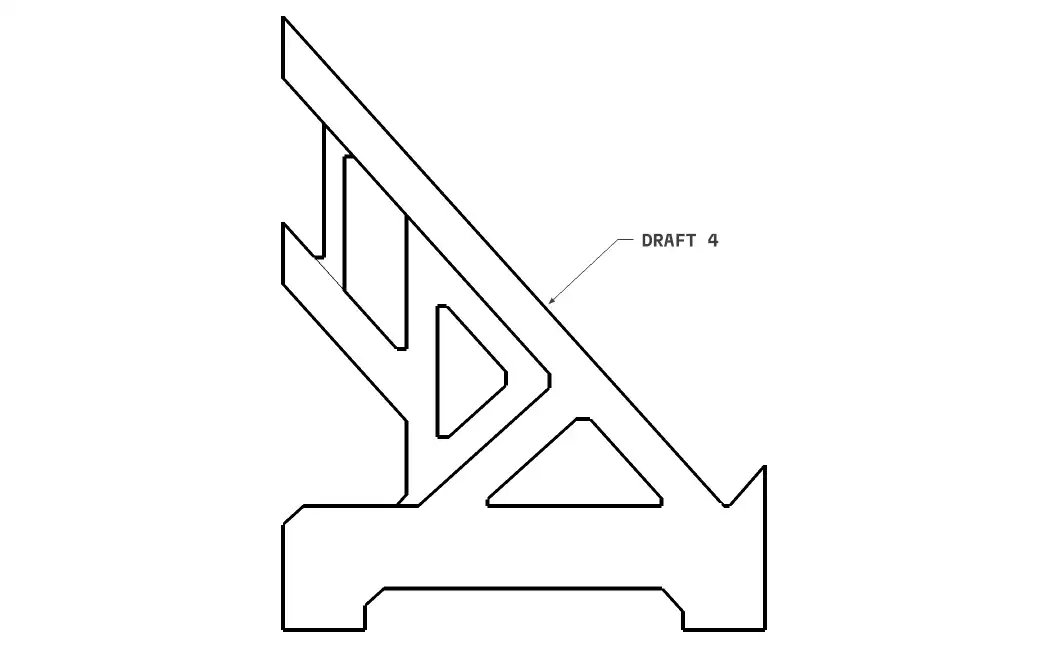
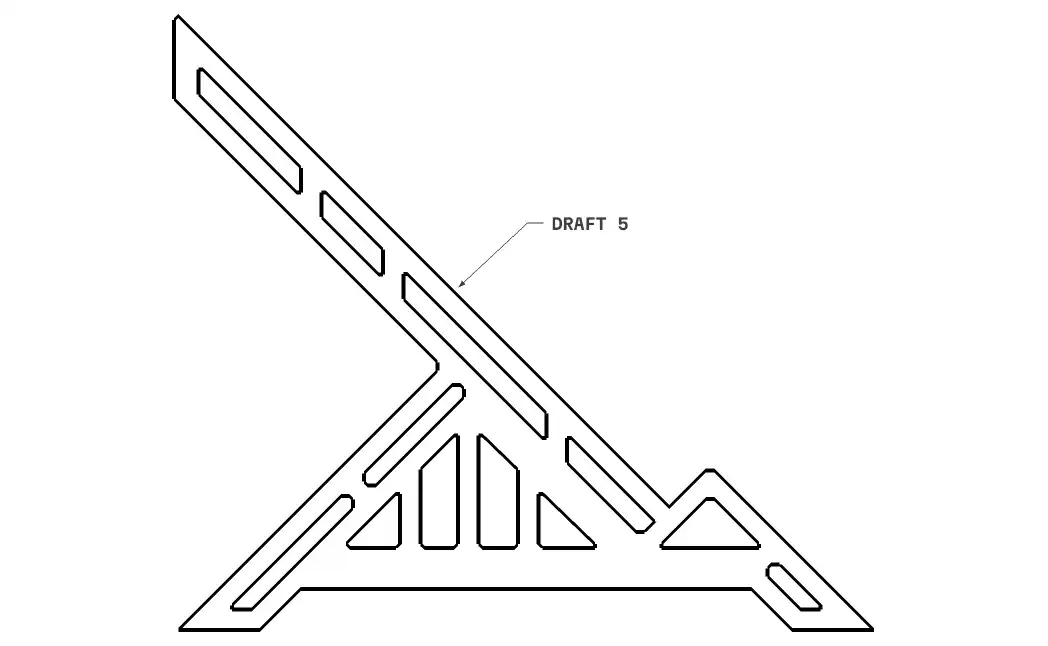
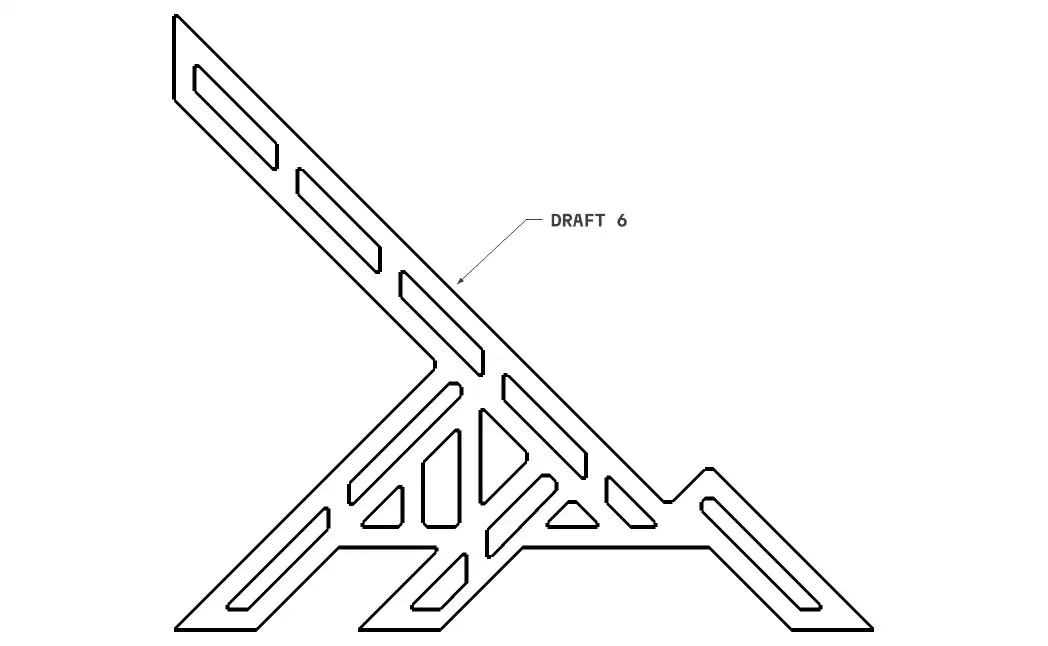
More sketches were done while developing the prototypes.
The “handle” at the back of the prototypes served no actual purpose, other than a “nice-to-have” feature which would not really be used. The “handle” existed to move the trigons back and forth: an action that could be performed using the legs at the base. So it disappeared.
The “cable hole” close to the “handle” also disappeared. Wires are better hidden under the laptop stand.
Later prototypes added a third “leg” to the base of the structure and adjusted the resting angle from the steeper 48° to 45°.
Each viable paper prototype was refined in SketchUp.
D.4. Material Choice
Considered what the trigons would be made of, and why. The manufacturing process was in mind from the beginning of the project, but the table made the final choice more decisive.
| 3D Printing | |
|---|---|
| Filament | Comments |
|
ABS Acrylonitrile Butadiene Styrene |
Durable, heat-resistant and impact-resistant. Ideal choice, depending on price. |
|
PLA Polylactic Acid |
Stiff, dense and affordable. Second choice, if ABS is unavailable or too expensive. |
|
PET-G Polyethylene Terephthalate Glycol |
Durable, water resistant, chemical and fatigue resistant. Expensive. Third choice, if ABS and PLA are unavailable. |
| Others | |
| Material | Comments |
|
Al Aluminium |
Best alternative if 3D Printing cannot happen. |
|
Wood |
Highly aesthetic but not feasible in situations where ethically-sourced wood of good quality is difficult to find. Would have to be redesigned to consider joinery. |
I decided to match the material of the keyboard: plastic.
Which means: 3D printing, with black ABS filament.
E. Chosen Design
Shown using standard orthographic projections: top, bottom, front, back, left and right.
Top
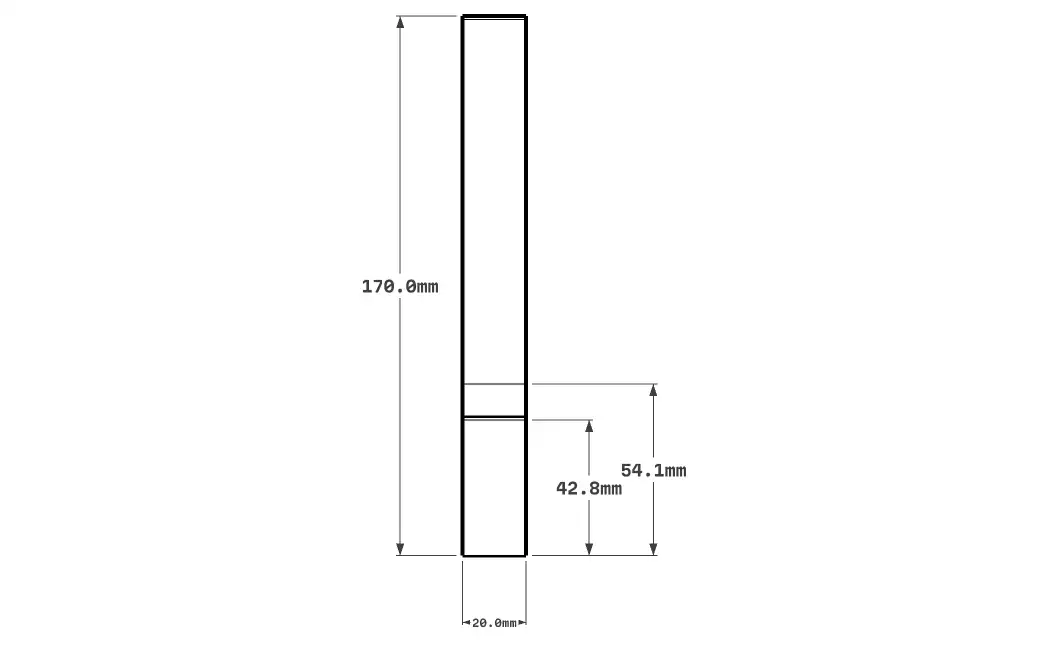
Bottom
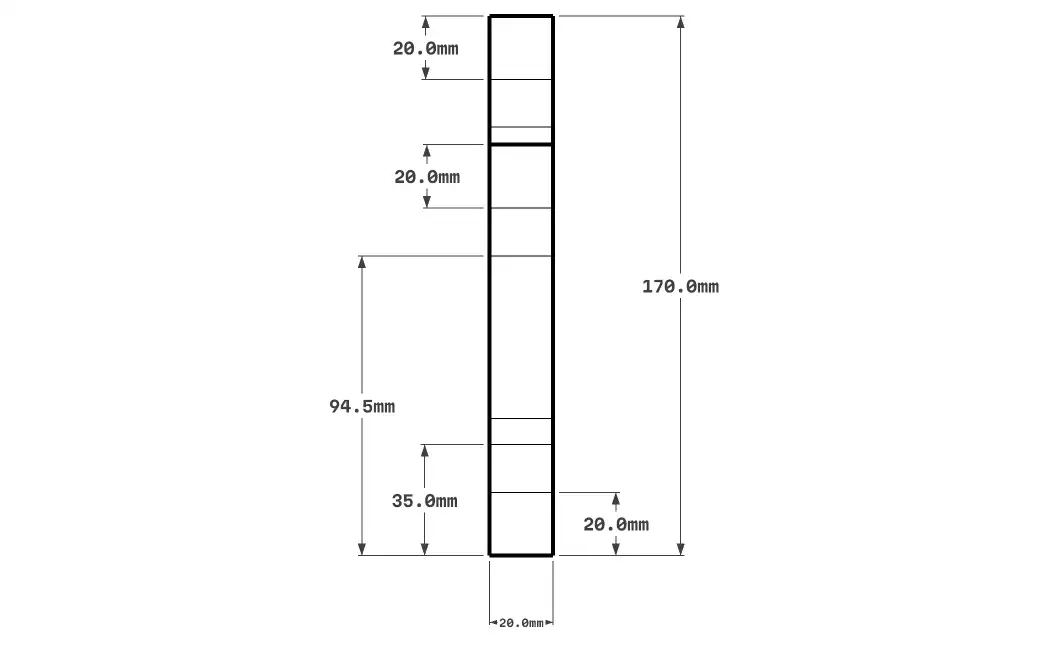
Front
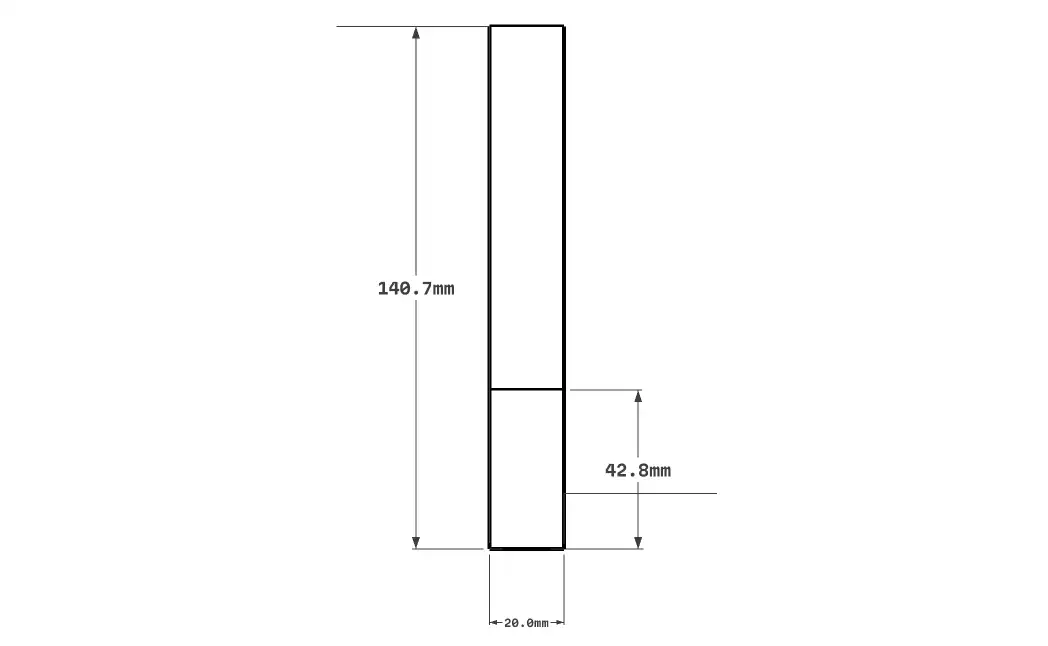
Back

Left
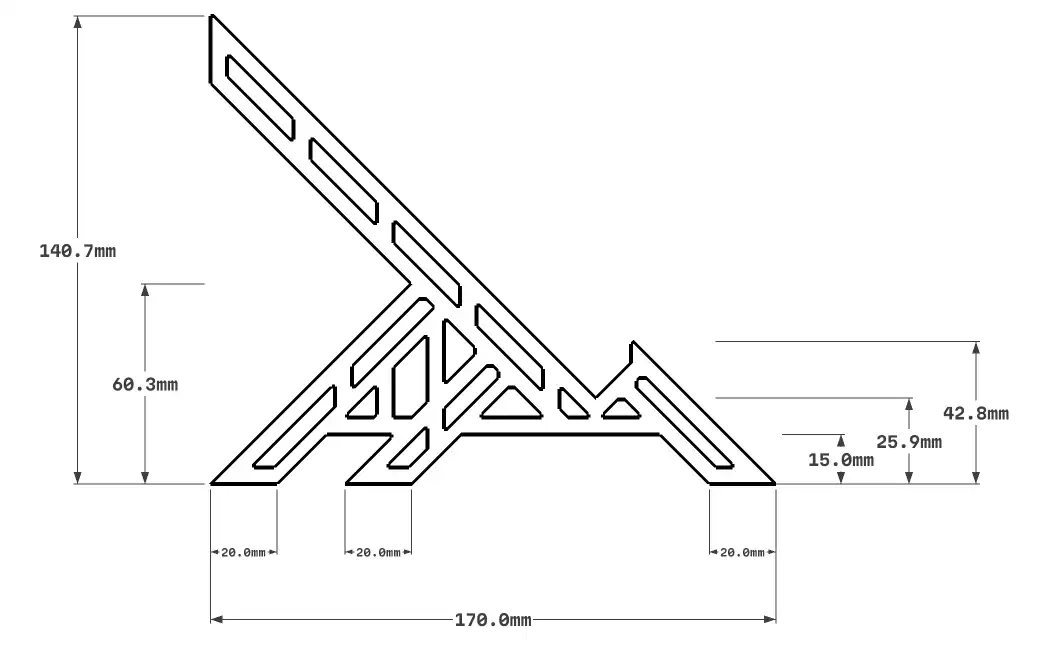
Right
F. Consultation
Exported the STL file from SketchUp to FreeCAD. Added fillets and exported the body as its own file.
Printer consultation and estimation happened. Turns out ABS was cost-effective.
Production commenced on February 2nd 2026.
G. Production
The 3D Printing process began on February 2nd 2026.
Final prints delivered on February 3rd 2026.
H. Assembly
Added felt mats to the trigons.
Each mat was not 20mm by 20mm. They had to be cut to fit the base. Exactly 6 were needed (3 per Trigon). After testing the grip on the desk before and after adding the mats, they prove to be a good choice.
I. Installation
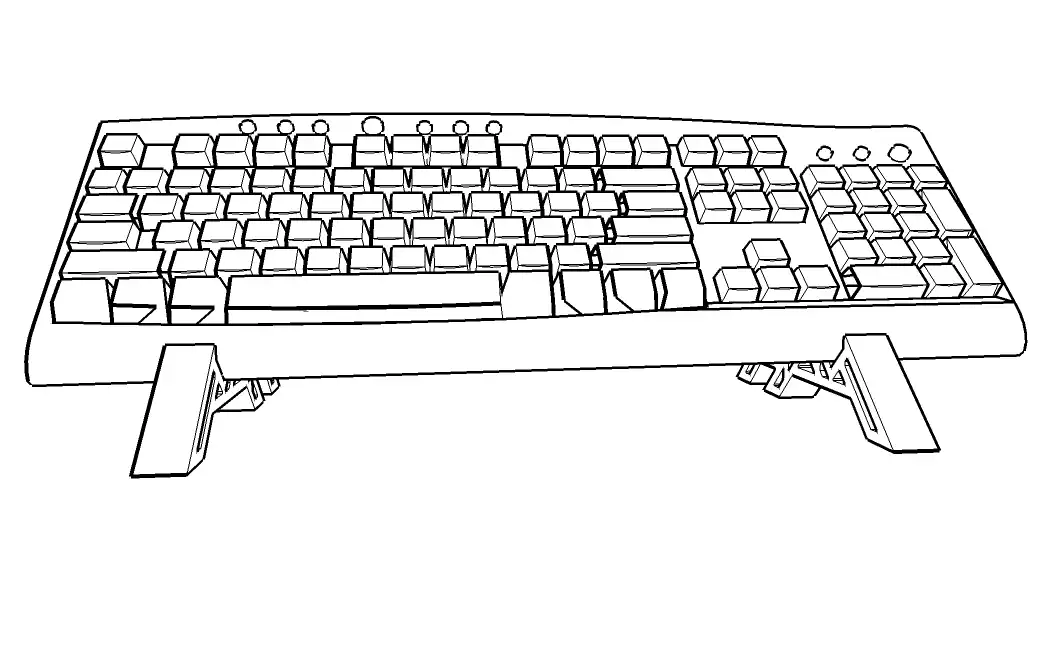
Placed the trigons on the desk, added the keyboard and test-typed.
No wobble.
Stayed in place. Freed up enough space on the desk to hide cables, allow more space for writing.
J. Review
J.1. Costing
Had to buy most materials and equipment, so the cost was high.
Also: hobbyist 3D printing in Kenya is expensive. Making anything tangible on this planet is expensive.
J.2. Service Provider
Service was good. Prints were delivered on time. Went with them because none of the other providers responded to my messages.
J.3. Time
Development time was constrained by budgets. Since I didn’t have most of the materials, had to wait to afford them before proceeding.
J.4. Textured Prints?
For future versions, friction between keyboard and trigon main hypotenuse would be improved with textured faces.
J.5. Thingiverse
Uploaded the final STL file to Thingiverse.J.6. Improvements
Must learn product photography.
Future versions will be height-and-slant-adjustable.
J.7. Challenge Checklist
Challenge # 1:
- Eye Strain: new screen and keyboard placement mean less squinting. (FIXED)
- Bad Posture: typing, writing may now happen with back straight. (FIXED)
- Desk Clutter: there is more space, and cables are hidden while also being easy to reach if needed (for charging, etc). (FIXED)
Verdict: WIN.
Challenge #2:
| 1st | is innovative | Keyboard rests/risers/stands already exist. But most of them are not this steep. | NEUTRAL |
|---|---|---|---|
| 2nd | makes a product useful | Typing, writing, drawing and sketching are easier now. | PASS |
| 3rd | is aesthetic | Appearance stayed true to the theme of triangles. | PASS |
| 4th | makes a product understandable | Most people did not have any idea what it was...probably until/unless they read this article. | FAIL |
| 5th | is unobtrusive | Most parts of the trigon structure will be under the keyboard, and invisible. | PASS |
| 6th | is honest | It does what it says. | PASS |
| 7th | is long-lasting | We shall see after months of use. | NEUTRAL |
| 8th | is thorough down to the last detail | Each 45-degree slant has a matching perpendicular. And every corner is beveled to make it easy to clean. | PASS |
| 9th | is environmentally-friendly | It’s made of plastic. Not sure if that’s a good or bad thing. | NEUTRAL |
| 10th | is as little design as possible | The support structure is elaborate. | FAIL |
Tally: NEUTRAL: 3. | FAIL:2 | 3. PASS:5
Verdict: WIN (PASS = 5 out of 10).
J.8. Final Office Setup
End
Make a pair.
This article is also a PDF (≈ 2MB).